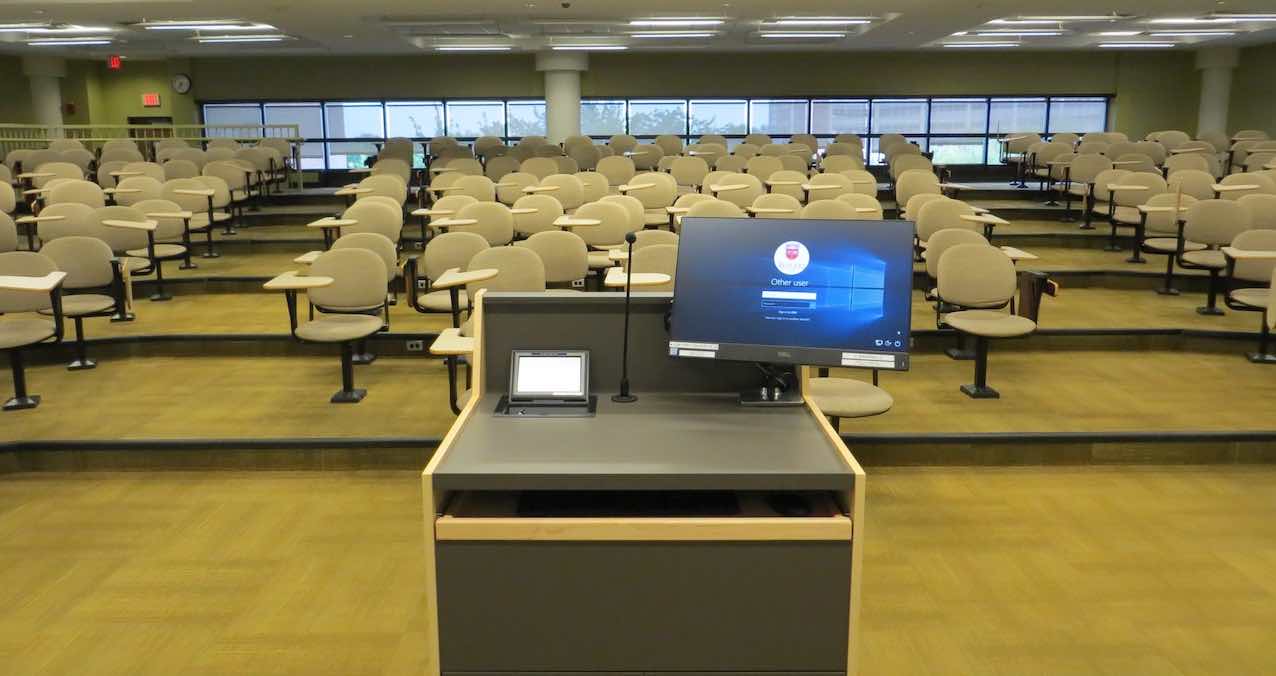
Robeson Library Penn 401
Robeson Library – Penn 401
300 North 4th St., Camden, NJ 08102 (View on map)
Classroom equipment
Capacity: 244
HD ceiling projector
Instructor computer
Personal laptop connection
DVD player
Blu-ray player
Document camera/lecture capture camera
Podium, handheld, and lapel microphones
Apple TV/Airplay
Miracast (Screen mirroring)
Windows 10
Penn 401 setup instructions
PENN 401 – A/V Guide
Extron TLP Pro 720C [Podium] and TLP Pro 725M [Rack]
(Download PDF version)
Room modes
When you press the button to start on the controller. You will be presented with three different options to pick from before you can proceed forward.
- Presentation mode: This is the simplest mode. Allows you display your content on both screens.
- Split-Screen Mode: This mode allows you to choose what content goes on what screen.
– Example: Podium PC on the left screen and Apple TV on the right screen.
* NOTE #1: Sound will only output from what input is selected for the LEFT Screen.
* NOTE #2: When switching from Split-Screen Mode to Presentation Mode and the input is stuck on different left and right inputs. Choose a different input and then the one you want to reset it. - Microphone Only Mode: This mode is only used if you only need to use the microphones in the room.
Using the Podium Computer
- On the podium, if the screen is black or displaying the screen saver, press the spacebar. The keyboard is located in the pullout tray. Wait for the login screen to appear. It may take approximately five seconds.
* NOTE: If nothing appears, press the power bottom on the bottom right of the monitor. - When the login screen appears, enter your Rutgers NetID and password. Press ENTER.
- Tap on the power button on the controller and select your mode: Presentation Mode or Split-Screen Mode.
- Once you have logged in and are ready to project, select PC in the first column.
- If you are in Split-Screen Mode, tap the projector you want to display the PC (Left or/and Right) on and then press PC.
- Once the projector has warmed up, the computer image will appear on the screen. Now, everything you do on the computer will be projected. There are multiple ways to access your presentation.
Using the Document Camera
The Document Camera is located in the pull out drawer to the right of the podium.
- In the Podium Controller, select Document Camera.
- Pull out the document camera drawer located on the drawer on the left side of the room.
- Raise the camera arm. Place your document or object on the document camera staging area and point the camera at your source.
- If the image is blurry, press the Focus button on the Document Camera.
Using the VCR/Blu-ray Player
The VCR/Blu-Ray player is located on the rack on the left of the room.
– NOTE: There is a portable USB DVD drive located in the pullout drawer on the rack if you wish use that instead.
- To begin, select Blu-Ray on the Podium Controller.
- Press the Open/Close button on the VCR/Blu-Ray player on the rack to the left of the room. The disc tray on the player will open after a few seconds. Place your disc on the tray. Then press the Open/Close button again.
– If using a VHS tape, insert it into the VHS tray and it will automatically play. - After loading, your disc/VHS will begin to play.
- Use the buttons in the center of the Podium Controller to control playback.
- To control the volume level, adjust the Program volume, tap on the up and down area on the middle right of the controller, or pressing the mute button.
Using a Laptop or Other Portable Device
The HDMI cable is kept in the drawer located on the top left cubby on the podium.
- Please remove the HDMI cable from the cubby on the podium.
- Connect the cable to your device or adapter.
- On the Podium Controller, select Laptop.
- Turn on your device.
- To control the volume level, adjust the Program volume, tap on the up and down area on the middle right of the controller, or pressing the mute button.
Using the Microphones
The classroom is equipped with one gooseneck microphone (located on podium), one handheld, and one lapel microphone. The handheld and lapel microphones are located to the left side of the room on the rack in a pull out drawer labeled “Remotes and Microphones.”
Goose Neck Microphone (Podium Microphone)
- This microphone will automatically turned on when you select one of the three room modes.
- If adjustments to the volume is needed, adjust the sound under the button “Microphone Controls” or Podium Microphone if you are in Microphone Only Mode.
Hand-held Microphone
- Move the power switch on the mic into the on position. Press and hold the power button on the button right of the Hand-held microphone.
- If adjustments to the volume is needed, adjust the sound under the button “Microphone Controls” or Microphone Hand Held if you are in Microphone Only Mode.
Lapel Microphone
- Open up the cover for the lapel and hold On/Off to turn on the unit.
- Clip the microphone to your clothing, near your neck and clip the receiver onto your clothing.
- If adjustments to the volume is needed, adjust the sound under the button “Microphone Controls” or Microphone Lapel if you are in Microphone Only Mode.
Please remember to return everything to its proper place. Turn OFF the projectors and logout of the computer when you finish!
For assistance, contact the RU–Camden IT help desk
Phone: 856-225-6274
Email: help@camden.rutgers.edu
