- Download zip file.
Begin by opening the template.ai file in Adobe Illustrator. Refer to the Adobe Illustrator navigation toolbar located at the very top of the program. File > Place > Locate your image you’d like to feature and click Place.
- Once the image is placed, with the image still selected in blue, in the top navigation bar go to Window > Align > Horizontal Align Center.
- Currently since each image submitted by the staff are different dimensions, there are no specific dimensions for how large the staff images should be, however you do want to make sure it is centered, displays the person well (main focal point with no cutting off the top of the head) and extends vertically past the top of the dartboard and underneath the banner (so vertically there is no more exposed white space.)
- You may click and drag it into the white dartboard frame, and then while holding the Shift key, either scale up or down to resize the image accordingly. The shift key keeps the image from distorting.

- Next, to create the background image, on the keyboard, type the following shortcuts in order, Command C to copy, Command 2 to lock the current selection, and then Command B to paste the duplicate image in the back. Horizontally Extend the image on both sides until there is no white space showing on either the left or right side. (You don’t have to hold down the Shift key this time.)
- With that image still selected, in the navigation toolbar go to Effect > Blur > Gaussian Blur> Adjust the radius to 250 and click OK.
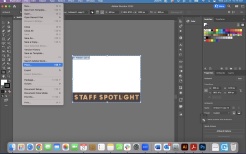
- To ensure the banner is stll in the front, Select the “Staff Spotlight” rectangle, right click and mouse over Arrange > Bring to Front.
- If the image appears to bleed past the artboard that is fine, because only the content that is placed within the artboard will show on the exported version.
- To save it as an .ai file in the navigation toolbar select File > Save. To export it to a different file format, go to File > Export > Export As, click to check “Use Artboards”, and choose the file type (PNG or JPEG), which is the preferred method to upload to the Rutgers IT website.