Built on the feature-rich Office 365 platform, Rutgers Connect offers a wide variety of tools to increase productivity and streamline user experience. This article will discuss three of these tools – Mentions, Templates, and Forms – and detail the ways in which they can assist with day-to-day tasks.
Mentions
With a constant influx of email from colleagues, departmental mailing lists, University newsletters, automated notifications, and more, it’s easy for a message to go unnoticed for some time as its recipient reads through his or her inbox. Often this is perfectly fine; not everything needs to be attended to immediately. Other times, however, this is not the case, and an individual needs to be made aware of something as soon as possible. Office 365 provides a handy tool to ensure that happens: Mentions.
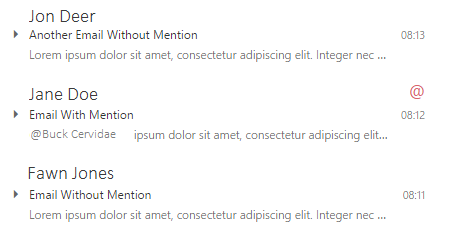
When composing an email, users can highlight the message for a specific individual. This marks it in the recipient’s inbox on OWA (Outlook Web App, located at connect.rutgers.edu) with a colorful, eye-catching @ symbol and lets him or her know that it requires prompt attention. An example of what such a message would look like is shown below.
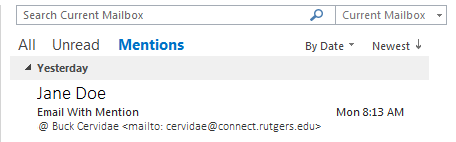
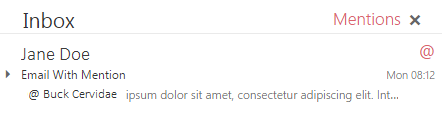
Although emails containing Mentions are not marked with an @ symbol in the desktop application for certain operating systems, such as Windows 7, they still stand out in another way: they can be filtered for in the Mentioned user’s inbox. This also works in OWA. The images below demonstrate this filtering in the desktop client and OWA.
To use Mentions, the sender must include the recipient’s name in the format “@FirstName LastName” (without quotation marks) and then choose the appropriate person from the drop-down list of University affiliates with that name. It is important to note that Mentions are only available for use in OWA and Outlook 2016; older versions of Outlook do not support this feature.
For more information, please see Microsoft’s article on Mentions.
Email Templates
Some types of emails may be sent very frequently; a department administrator might routinely request access to some service for each new employee every time one is onboarded, or a manager might regularly ask their direct reports for status updates on projects. It often seems that the same words are being rewritten every time, which can grow tiresome very quickly. But Office 365 provides a solution: email templates.
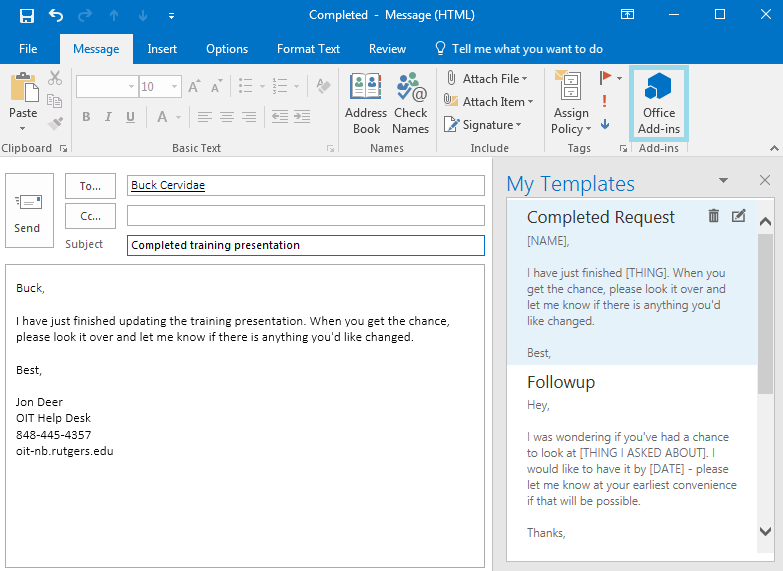
Users can create templates for the various types of emails they send frequently, and then use them as shortcuts in the future. Examples of the template interfaces in OWA and in Outlook 2016 are shown below; the icons which lead to them in each client are highlighted.

Forms
Microsoft Forms is a component of Office 365 which allows users to create, share, and respond to (as the name suggests) forms. It’s well-suited for a variety of purposes; a professor could give her students a quiz, a department hosting a luncheon could send out a form with menu options and a yes/no plus-one question, a group which presented at a conference could ask attendees for feedback, or administrators of some particular service could run customer satisfaction surveys.
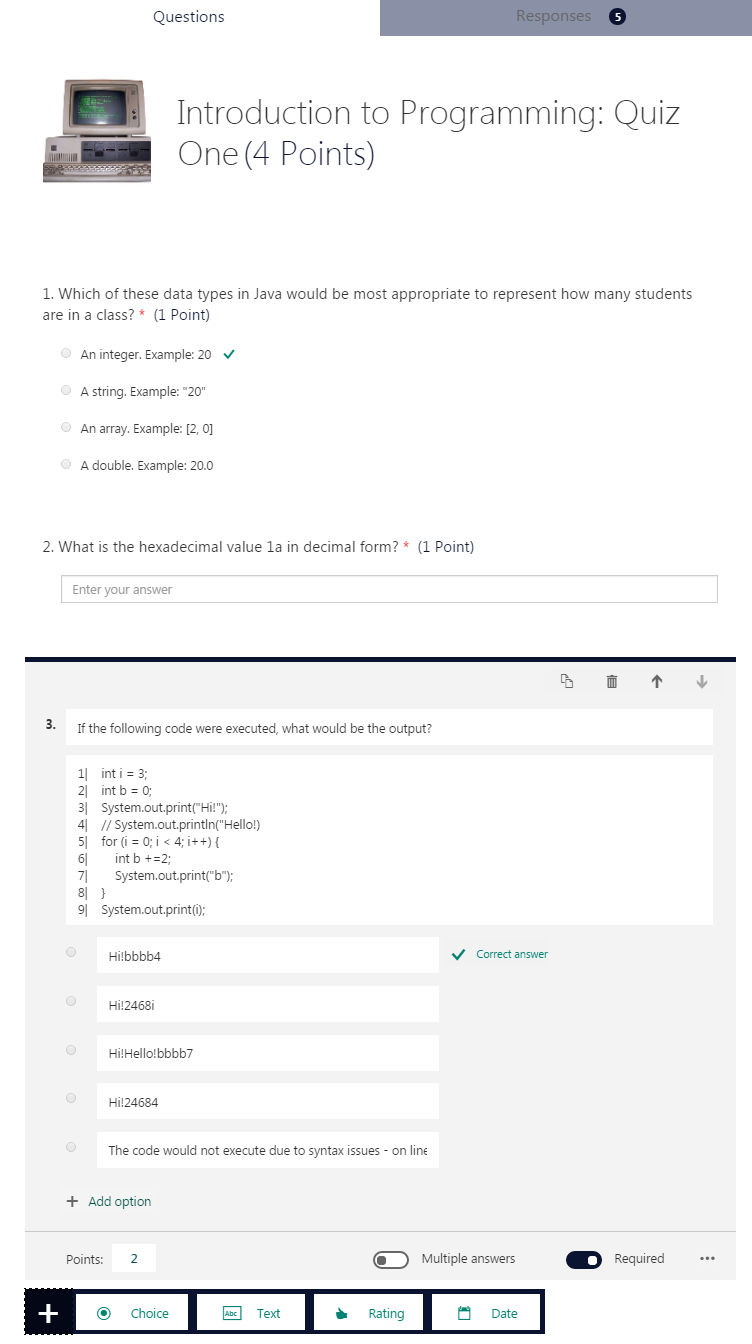
Several types of questions are supported: multiple-choice, text/free-response, rating, and date. Form creators can place restrictions on responses, such as requiring a positive number as an answer to a free-response question, which ensures valid responses (for example, if asking how many party members a reservation is for, neither “0” nor “Smith” should be accepted). In the case of quizzes, multiple-choice questions can be auto-graded while other types of questions must wait for review by the form creator.
The designer menu for an example form is shown below.
Creators have a variety of options to choose from when sharing their forms. One method of sharing is “share to collaborate”, allowing others to edit the form and view responses; another is “share as a template”, allowing others to create their own version of the form and make changes to the design but not to examine submissions for this particular instance of the form. The most common way is “share to collect responses”, which grants no administrative privileges but allows users to see the form and submit responses. This type of sharing can be limited to individuals within Rutgers or open to anyone with a link to the form. (Technically, “share to collaborate” can also be made open to anyone with the link, but this is not recommended.)
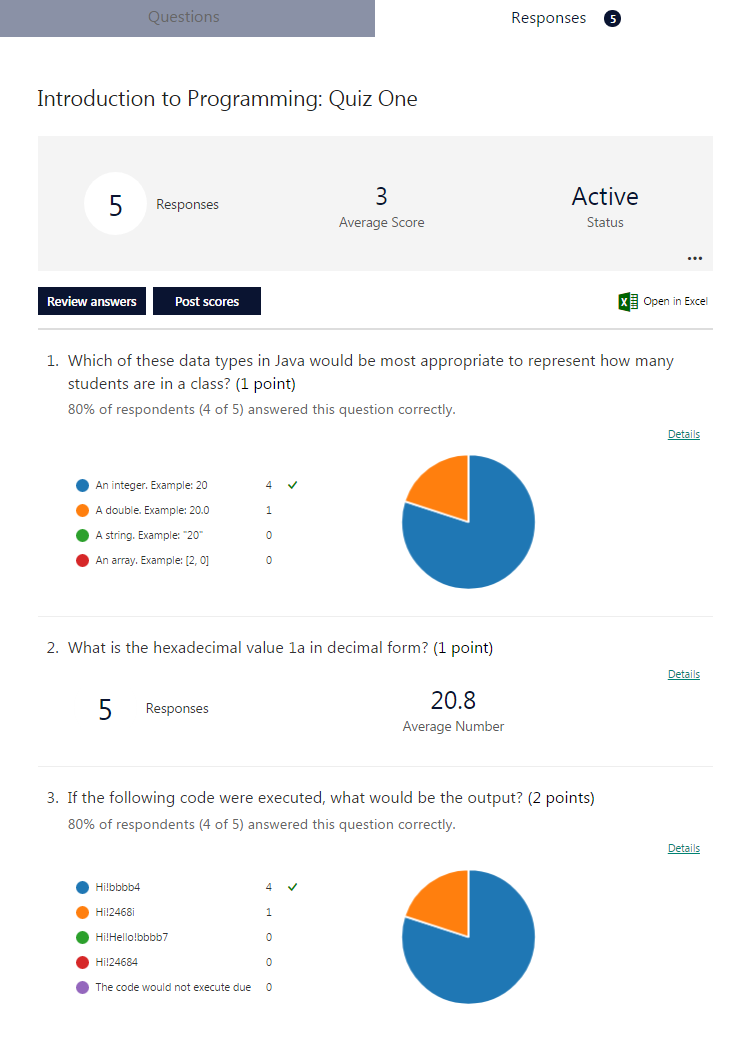
Once the form is shared and responses are gathered, creators and collaborators can view them in summary as well as in detail. Below is an example of the first viewing option, which provides statistics about each question rather than individuals and their responses.
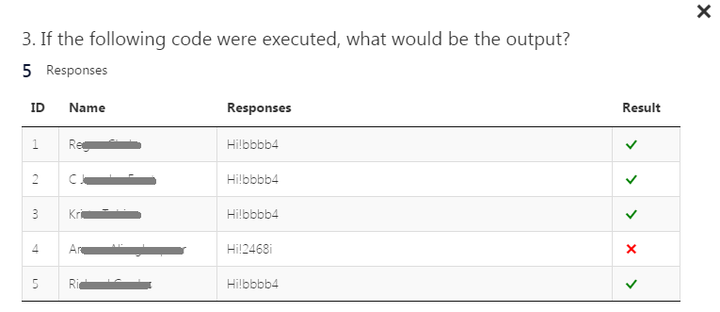
More detailed results are available in several forms. The full list of responses matched with the corresponding participants, submission times, and more is visible through the “Open in Excel” option. “Review answers” allows for viewing responses by participant rather than by question, and “Details” next to each question displays individual responses only for that question, as displayed below.
The Forms portal is accessible from Rutgers Connect through the Office 365 App Launcher (the “waffle” in the top left corner) or directly at forms.office.com. Users interested in learning more may wish to visit the Microsoft website and read What is Microsoft Forms?, which explains how to get started using the various features of Forms.
Author: Rae Clarke
Stay tuned for upcoming articles discussing additional Office 365 features! If you have any questions, comments, or suggestions regarding the Rutgers Connect article series, please write to help@oit.rutgers.edu.